• HOME
  • About
  • Categories
    • Motherhood
      • Callie Marie – Birth Story
      • Hospital Bag
      • 0-3 Month Favorites
      • 3-6 Month Favorites
      • Babies and Their Sleep
    • Food & Drink
      • Crazy Chocolate Cake
      • Instant Pot Chicken Noodle Soup
      • Peanut Butter Popcorn
      • Cucumber Salsa
    • Beauty
    • Fashion
      • Father’s Day Gift Guide
    • Home
      • Callie’s Nursery
      • Kitchen Renovation & Kitchen Favorites
      • Father’s Day Gift Guide
  • Links
  • Contact
    • Email
    • Instagram
    • Pinterest
    • RSS
    • TikTok

Motherhood with Maddi

Categories: Fashion, Home

Father’s Day Gift Guide

Father’s Day is right around the corner, and I wanted to find some practical gifts for those awesome dads in our lives. This is the first Father’s Day that my husband will get to celebrate so it’s even more exciting this year. Of course, he’ll tell me that he doesn’t want a gift, but come on! It’s Father’s Day! Let me celebrate you a little bit! ❤️

Non-Traditional Gifts 🌱🌺


In year’s past, my Father’s Day gift to my dad has been the flowers for his planters. He hates doing them, so I just go out and buy his flowers and then plant them for him! Since I had a baby to worry about this year, he went and did it himself so I’ve been on the hunt for gifts for him and my husband! (He told me that he won’t be trying his pots again and that I’m always hired to do it from now on… 😂) This would be a great gift idea for your dads if they don’t like planting or picking out flowers themselves.

Another good idea would be a lawn subscription service! A popular one I’ve seen is Sunday. It’s a custom lawn care plan that analyzes your yard and all you have to do is spray it on. They send everything straight to your door and you don’t have to plan/think/research – it’s all done for you.

Something You Can Wrap 🎁


If you don’t want to go with either of those ideas, I have a list compiled that I will put below. I will link all of the products (and I do earn a small commission if you shop through those links) or you can go straight to my LTK and shop there. A lot of these items can be found on Amazon’s website so if you’re a last minute kinda person, they should still get to you pretty quickly! 😉

I would love to know what you’re gifting for Father’s Day this year or previous gifts you’ve given! This is the first year of many for Colin so I’m going to need lots of future ideas!

Grilling


Traeger Grill – I don’t know a guy that has a Traeger and doesn’t like it! Plus if you gift it to your husband, it’s like a gift for you too! Less cooking! 😜
Traeger Cookbook – To go along with the traeger grill or if they already have one, this book is full of new recipes they can try out!
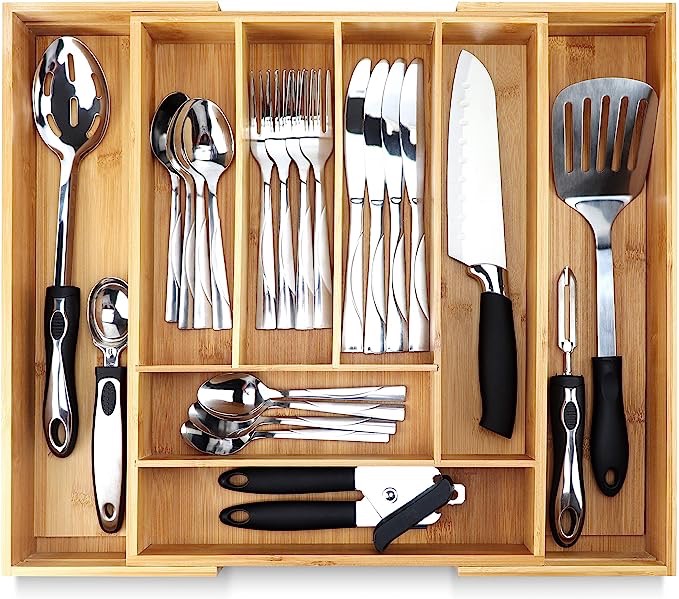
Grill Kit – My husband is constantly stealing spatulas and tongs from my kitchen so this would be a great gift so that he has his own set of utensils.
Meat Thermometer – This one connects to your phone and also has an actual device that shows the temperature, but the probes are corded. I’ll also link this one that is cordless, but it is more expensive.
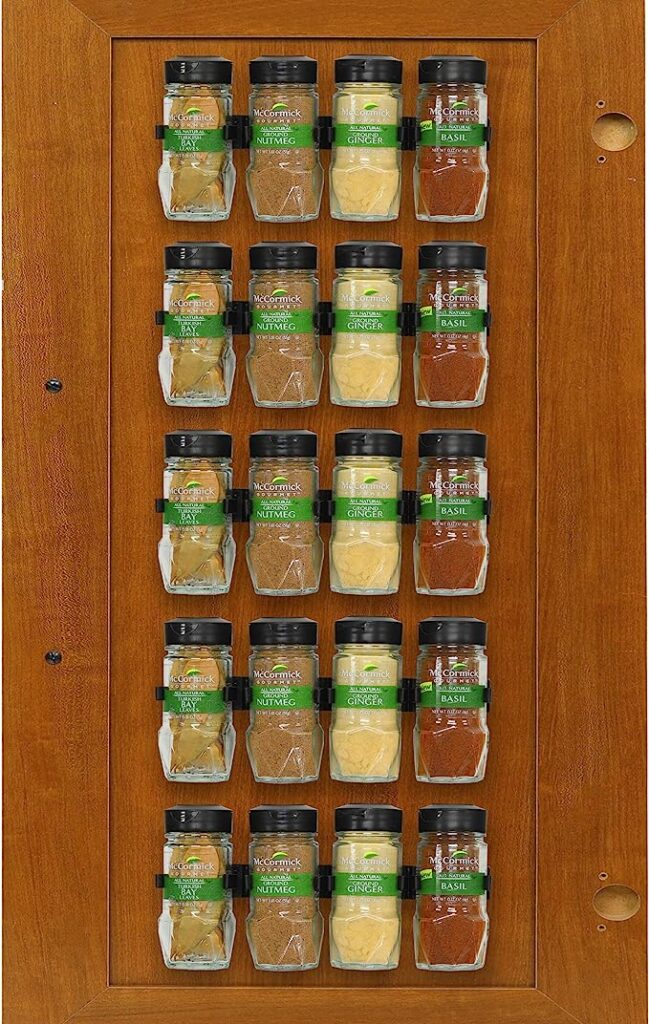
Spices Gift Set – Five different smoked spices for different grilling purposes.


Outdoor

Brutank Cooler – Such a great cooler to have for lake days, camping, traveling, BBQs, etc.
Hopsulator Trio – This koozie holds 12 ounce cans and 16 ounce cans and comes with a lid to become a tumbler for mixed drinks.
Garden Hose – This garden hose expands to 125 feet making it very compact and not taking up tons of space.
Garage Light – We actually got these for my Father-in-law last year and they are so nice and very bright! Great for a guy who loves tinkering!

Clothes

Cartartt Money Clip – I actually got this exact money clip for Colin a few years ago and he LOVED it. He’d still be using it today if our dog hadn’t chewed it up 🫠
Carhartt Wallet – If your guys isn’t into money clips, this is a great option for a wallet!
Under Armour Golf Shorts – I feel like a good pair of golf shorts are just a staple in every dad’s closet whether they actually golf or not!
Under Armour Golf Shirt – I always gravitate towards grey for whatever reason and I loved the look of this golf shirt!
Nike Joggers – I got Colin a pair of Nike Joggers a couple of years ago when joggers became “cool” and he loved them so much that we ended up getting them in another color and I got myself a pair because they were so comfy!
Cuts Short Sleeve Tee Shirt – I have heard only good things about this brand and I feel like Colin would love these! Great staples to have in the closet!
Cuts Long Sleeve T Shirt – Same brand but in a long sleeve!

Categories: Home

Callie’s Nursery

My absolute favorite room in our house is my daughter’s nursery. It’s the prettiest in the morning right after the sun is coming up and shines through the window. When we found out we were having a girl, I instantly starting Pinterest-ing for inspiration and found so many ideas. I knew I wanted pink, but not an overwhelming amount or the typical “baby” pink. A muted, rose/mauve pink was the idea. I also wanted a little bit of floral for an additional feminine touch, but very subtle. My goal was to have a theme in the sense that everything went well together, but a “theme” was unidentifiable… I know probably doesn’t make sense.

Overall, I am so happy with the result and I can’t wait to share it with you in detail. Almost everything I talk about in this post is linked HERE. If you just want to see the pictures, they are at the bottom of this post!

The Grey Debate


The first thing we did was pick out furniture. We did this SO early (before my first second trimester) but we were still living in the “back ordered” times due to Covid. Stressing about our nursery furniture a few weeks before I was suppose to deliver? No thanks. Originally, I wanted a white crib and dresser, but couldn’t find what I was looking for. So, we went with grey. We found our crib, dresser, changing table topper, and rocker at Nebraska Furniture Mart. I know there are big opinions on the need for a changing table or not, but we use ours All. The. Time. I liked the fact that we could incorporate it into the dresser and remove the topper when we were done with it!

I debated and debated and debated on whether or not to paint the nursery. The walls were grey. All of the furniture was grey. And I kept thinking it was going to look like a big grey blob in there. Buyer’s remorse for the grey furniture set in and I kept telling Colin that it was going to look so “blah” with grey paint and all grey furniture. He reassured me that it would look just fine, but if I really wanted to paint it, that we could. Ultimately I decided to not paint (mostly because I did not have the energy at this point in my pregnancy). I figured that with curtains, wall decor, and some other items in there, it wouldn’t look so monotone and I really liked how it turned out!

We also decided to “redo” the closet which was a pretty quick and simple upgrade that really maximized the space. There are no closet doors (they were gone when we moved in) so you can see everything. I keep things very organized, but it only had one wire rack up high which felt like wasted space. Colin went to Lowe’s and got two black clothing rods, black brackets, and two white shelves. We agreed that since baby clothes are so small, it would be better to have two rods instead of one to maximize the space. He spend one evening putting these up and it turned out so good!

Then the furniture was delivered, and Colin assembled it. We arranged it basically the only way we could in a tight space. With just the furniture in the room and nothing else, I was reeeaallly kicking myself for not painting because it was a lot of grey. But just like Colin said, it turned out fine in the end!

Pretty In Pink

After the furniture was assembled and the closet was finished, I was ready to start adding the touches of color that I wanted. I started out by finding a crib sheet and matching changing pad cover that fit exactly what I was envisioning. The print was absolutely beautiful and was just what I was looking for. It’s covered in the most gorgeous pattern of pink flowers and loved them so much that I ended up ordering a blanket for the chair, and a car seat cover in the same print. (We actually wrapped her in the car seat cover for her newborn photos and they turned out beautiful.)

Then I found curtains that matched – a shade of pink from Target that matched the crib sheet perfectly. With just the curtains up, and the crib sheet on, I could see a light at the end of the tunnel with making sure her room didn’t look so grey.

I learned this tip for hanging curtains a while ago and it truly does make a huge difference. When you hang curtains, do not place the end of the curtain rod at the edge of the window. Place it 6-12 inches further than the edge of the window. It makes the window and room look SO much bigger. When you place the end of the curtain rod directly above the edge of the window, you won’t be able to see all of the window when you push the curtains open losing lots of natural light.

Little Details

At this point, it was starting to come together and didn’t look like such a grey blob anymore. We hung a mirror (also from Target) above the changing table which also made the room look bigger, and some acrylic bookshelves (from Amazon) on another wall to take up some of the grey space which helped even more. Her name was a surprise so after she was born, we hung the sign above her crib and it fit perfect. It’s a large sign from Etsy and I love it because it’s very neutral, but also feminine.

The only light we had was the overhead light and any natural light that came in during the day, so I added a lamp from Target which is basically all we use. It’s the perfect amount of light for feeding and getting her ready for bed. I wanted a place to set her sound machine, my phone, drinks, bottles, etc. So, a small, round nightstand from Amazon found it’s home between the crib and rocker and it fit perfectly in the small space. I also bought two larger baskets to use for dirty clothes and blanket storage. The most perfect addition that we got was an elephant rocker from Pottery Barn. It was the sweetest gift and it tied the whole room together.

A Few Months In


After using the nursery for several months now, I don’t even notice the overwhelming amount of grey so I’m glad that I didn’t spend the time painting it a color that future buyers wouldn’t like. Of course like any room in any house, there are always things left unfinished. Our newborn photography session was months ago and while I did print some of the pictures, they have yet to be framed and hung… mom life. But I definitely plan on doing that sometime soon!

I love everything about her sweet little room and the sense of calm it brings me when I walk through the door. By the time she’s old enough to remember things, we will most likely be out of this house and it makes me a little sad that she won’t remember this cozy little nursery of hers, but I am so glad I have pictures to show her.

I have everything linked at the top, but if you missed it, you can find *almost* everything here!

Categories: Home

Kitchen Renovation & Kitchen Favorites

It’s been a little over a month since we finished updating our kitchen, so I thought I would share our process along with some of my favorite kitchen items! This is not our forever home, and we don’t plan on being here a long time, so we didn’t want to spend a ton of money, but we also were tired of the late 90s early 2000s aesthetic that our kitchen was giving. So Colin, and I did a little research and dove in one weekend.

Our cabinets were oak (orange-y), our countertops were an off white laminate, and we had a very shallow stainless steel sink – all things we decided on updating/replacing. The appliances are white, and are working fine, so that was not something we wanted to spend money on. After talking about it and looking at different options, we decided to paint the cabinets white and add black pulls, paint the countertops using a specific kit, and replace the sink and faucet.

The whole project took two full weekends to finish, but we honestly estimated it taking much longer. We both agreed that had we known we’d be able to complete it that quick, we’d have done it much sooner. Granted, we have what my grandma calls a “one-butt kitchen” so if you have more cabinets and countertops, it will probably take longer.

The first weekend was spent painting the cabinets. We didn’t sand the doors and we kind of regret not doing that. We read that it’s not necessary, but we also didn’t use “cabinet specific” paint which is what you should use if you aren’t sanding. We asked someone in the paint section and they recommended a certain paint, and after it was mixed, we saw the “cabinet paint.” Whoops. This process took one full weekend (thankfully Callie was SO good that weekend.) We started by doing a good clean on the cabinets, and then taking the doors off and priming. We let the primer dry for 2-3 hours before starting with actual paint. We chose Sherwin Williams “Pure White” because that is the same color as our trim. We did two coats with an overnight dry time in between. When they were fully dry, we noticed a little bit of chipping if we knicked the paint with our nails. (Again, probably because we didn’t use the correct paint or sand.) So, we decided to add a top coat. We went with a polycryllic and did two coats of this.

Once we were satisfied with the paint, Colin added the pulls. We went with simple black pulls and we got them from Amazon. They were pretty reasonably priced, and we only needed about half of them. We were lucky in the fact that our current cabinets didn’t have any pulls to begin with so we didn’t have to worry about any previous drill holes. If you do replace pulls, make sure to measure the distance between the holes so the new ones match.

Fast forward one week and we were back at it to finish the countertops and install the sink. Our original plan was to install new countertops, but it was going to be months before they were in stock and for the tiny amount of countertop space we had, it seemed ridiculously expensive for laminate. I remembered that I had seen videos on TikTok about people painting their countertops so I did a little research in that!

The cost of the countertop paint we purchased was $100 and we liked the looks of it from the videos we saw. Colin and I agreed that if it didn’t work, we’d really only be out our time so we gave it a shot. The process itself was easy, but it was much more time consuming than we estimated. The kit comes with a primer, three colors, and a top coat. (There are five different colored kits to choose from.) The prep work included double taping around the counters because the primer can bleed through, and then cleaning the countertops.

If you have a second person with you, the actual painting of the countertops goes pretty quickly. If you are by yourself, add plenty of time. We started with the primer – I used the sponge to cut in everywhere, and Colin followed behind with the roller. In our small space, we were done with this in about 30 minutes. BUT the kit said to allow for eight hours of dry time. So if you want to get this done in a weekend, START EARLY. We didn’t start until noon so we couldn’t do the next step until later that evening.

Once the primer had dried, we took the three colors and the sponge and dabbed them one at a time all over the counters. I started with one color, and then Colin followed behind with the next. I did the third color and then he took a clean sponge to blend. This all happens at the same time, no drying in between. After we finished, I wasn’t thrilled with the look. It was very patchy and not blended well. So I went back in with a little white, and the clean sponge and blended and blended and blended until I was happy. It took me a little while to get the technique, but it looked so good once I did! The blending process took about 2 hours with two people so if you’re by yourself allow for extra time.

Another 4 hours of dry time was needed, so the next morning we did the top coat. It was the same process as the primer. We waited another four hours and did a second top coat as recommended. Four hours after that, Colin installed the sink. I could not tell you one thing about that process as I stayed out of his way! Once that was finished, we caulked around the sink and any edges where the counters met the wall.

Just the added dry times added up for the countertops is 20 hours plus the time it takes to prep and paint, so plan accordingly if you choose to do it! That being said, I love how they turned out and would definitely do it again! For the price, it was totally worth it and completely transformed the look of our kitchen! Adding a black sink was the perfect touch with our white cabinets and grey countertops.

Things we would do differently if there was a “next time”: get the correct cabinet paint, sand the cabinet doors a little bit, and start the countertops earlier. To sum up our process and outcome, it was much easier than we anticipated, and LOVE the result. 10/10 reccomend

In addition to our renovation, here are some of my favorite kitchen products!

Utensil Drawer Organizer
Aesthetic, adjustable, practical.
Silverware Drawer Organizer
Same as above!
Paper Towel Holder
Great for keeping counters clean. The adhesive did not work so we did use the screws but it works great!
Sink caddy
Basic black caddy to keep your sponges from stinking!
Spice Organizer
The best kitchen item I’ve found! Perfect for smaller kitchens or just saving space. I’ve had them up for 2+ years and they’ve never fallen.
Wireless Remote Outlet Switch
We keep a lamp above our cabinets and use this to turn it on and off
Glass Storage Jar
We keep our coffee in this and it’s so cute!
Towel Hooks
These are great to have in the kitchen, bathroom, laundry room, etc!
Unflavored Collagen
A little odd to this list, but I love using this is my coffee every morning!

Welcome!

Welcome!

I’m Maddi - a wife and first time mom to a beautiful little girl. I’m a homebody who loves comfy clothes, good food, and an Amazon package on my front porch. Being a mom is something I dreamed about for many years, and it’s what I always wanted to be when I grew up. I’m here to share my journey as well as learn from other mamas as I go. 
Thanks for stopping by!

  • Email
  • Instagram
  • Pinterest
  • RSS
  • TikTok

Pages

  • About
  • Categories
  • Contact
  • Links

Search The Blog

Popular Posts

Preparing for Baby Led Weaning

Starting Baby Led Weaning

Tips for Baby’s First Road Trip

Follow @_madisonniemeyer_

Copyright © 2025 · Motherhood With Maddi - Theme by Blog Pixie